


Intro of How to Sterilize Beauty Tools at Home
I recall the time when I did not even think about cleaning my beauty tools. I had spent hours in an ideal makeup appearance only to find the next morning the very next morning that I had an irritated skin around the cheek and jaw lines. I even told my foundation, my cleanser, the weather but what was really causing the problem was hiding in my makeup brushes.
Table Of Content
- Intro of How to Sterilize Beauty Tools at Home
- Key Takeaways
- What Happens to Beauty Tools When Not Cleaned
- Sterilization: The Actual Definition
- Cleaning vs. Sterilizing
- The Success of Home Sterilization
- Pre-Cleaning: The Phase That Most of Them Forget
- Why Pre-Cleaning Matters
- How to Pre-Clean at Home
- How to Wash with Soap and Water
- Temperature and Technique
- Timing Matters
- Alcohol: A Cleaner, Easy and Active
- How Alcohol Works
- Using Alcohol Safely
- Drying: It is a Sometimes Forgotten and Yet Important Process
- Why Drying Matters
- Best Practices for Drying
- Cleaning Equipment and Storing
- Clean Storage Saves Health and Saves Time
- Avoiding Common Mistakes
- The Development of Realistic Home Sterilization Routine
- Day, Weekly and Monthly Habits
- Listening to Your Tools
- Green Credentials of Sterilizing Beauty Instruments
- The Rationality of People to the Natural Approaches
- Vinegar as a Sterilizer
- Lemon and Hot Water Method
- The Traps of Domestic Sterilization
- Using the Wrong Products
- Skipping Drying or Storage
- Excessive or Over-squeezing
- Sterilizing Hair Tools
- The Reason Why Hair Tools Should Be Treated in a Special Way
- Washing and Decontaminating the Hairbrushes
- Sterilizing Nail Tools
- Why Nail Tools Are High-Risk
- Good Housekeeping Sterilization
- When to Replace Nail Tools
- Tooling and Servicing of Technological Tools
- Makeup Sponges
- Metal and Glass Tools
- Wooden Tools
- An Easy Guide to Self-Sterilization
- Daily Routine
- Weekly Routine
- Monthly Routine
- When to Change Tools: How to Know
- Frequently Asked Questions
- My Opinion
I had been doing a poor job of cleaning them or not cleaning them at all during the weeks. That was one of the lessons that taught me that there are far too many people in the beauty industry who are concentrated on the products, and not the tools themselves.
There is direct contact with the skin, hair, and nails with beauty products, including brushes, tweezers, combs, nails and nail clippers. Slowly these instruments become covered with sweat, oil, dead skin cells and remains of the products. When left unattended, they provide breeding grounds to bacteria and fungi as well as moulds.
Such microscopic intruders can lead to acne, irritation, infection of the scalp, nail issue or eye infection. And what is even more terrible, in most situations the damage is not manifested on the surface. By the time you could notice breakouts, itchiness or dullness of your hair, the problem has already added.
This is the reason why one needs to learn how to do beauty tools sterilization in their homestead. It is not a measure of insurance in itself since it is an investment in your health, skin and hair. Sterilization is done periodically in order to maintain the instruments upon which you very much depend safe, efficient and effective.
Key Takeaways
- Rinse wiping tools using clean cloths prior to any form of sterilizing.
- Mild soap, hot water and alcohol or vinegar are used as a safe sterilization.
- Failure to store dry tools in advance will result in bacteria growth.
- Duplication of tools when they are worn, rusted, or spoilt to have it hygienic.
- Design a daily and weekly schedule and monthly schedule of work to uphold the safety and effectiveness of the tools.
What Happens to Beauty Tools When Not Cleaned
Make-up implements build up. Makeup is absorbed in deep fibers of the brush. Hair products are positioned near the bottom of hair tools. Debris of the skin on sharp corners are acquired with nail tools. This sewage feeds germs especially in warm or damp rooms.
This danger is not apparent at once. On the skin, repeated exposure to a stimulus responds. Little breakouts would be seen on the jaw or the cheeks. Eyes feel irritated. It itched at the head, which was washed. Nails weaken or change color. These signs are augmented by the instruments not being stored in a clean state.
The cause of why one should use dirty tools is a reusability issue.
You are rubbing dirty things into fresh flesh so often. Yea the very gleaming skin is bare. This will continue to cause irritation and slow down healing. In a bid to correct the issue, a number of people find themselves taking more products but the cause of the issue is not addressed.
The process starts by education on the maintenance of the tools and not the products.
Sterilization: The Actual Definition
Cleaning vs. Sterilizing
The departments of cleaning and sterilization are confused in many aspects. Cleaning is the process of removing the visible dirt or makeup or residue of a certain product on a tool. You can run it in water and can have it shining. Sterilization on the other hand renders bacteria, fungi (among other harmful microbes) safer.
You will not achieve sterilization levels at home like at the hospital, but you will achieve the minimalization of the number of germs that would allow your skin, scalp, and nails to be safe. The mismatch is not that big at a glance but very significant. It may look like the brush was clean however as the depth of the brush, they may be bacteria that are harmful. It is the assurance that the left germs will not be invisible as a result of sterilization that follows pre-cleaning.
The Success of Home Sterilization
You do not need to use a lot of money to buy costly salon tools to store your tools. Most of the personal tools are on your own skin. When you care about them, you have reduced significantly the risk of being infected. Home sterilization is also another method of prolonging the life of your tools.
Their brushes do not become out of shape, the metal tools do not rust easily and the sponges do not disintegrate. Not only it is hygienic, but it is intelligent, intelligent and sustainable beauty care.
Pre-Cleaning: The Phase That Most of Them Forget
Why Pre-Cleaning Matters
The instruments must be already washed before any form of sterilization. Alcohol or heat sterilizing agents are not able to reach the germs under the makeup, hair product or skin debris without first having to remove the buildup. Some of these sterilization practices in the domestic environment cannot be successful due to the failure to pre-clean.
As an example, when cleaning the makeup brushes, one may find the foundation and powder deep in the bristles. There is no way that spraying the brush with alcohol will fully penetrate. The styling products are stored in hairbrushes in proximity to their base, and the nail tools in grooves store the dead skin. Pre-cleaning can be used to remove this barrier.
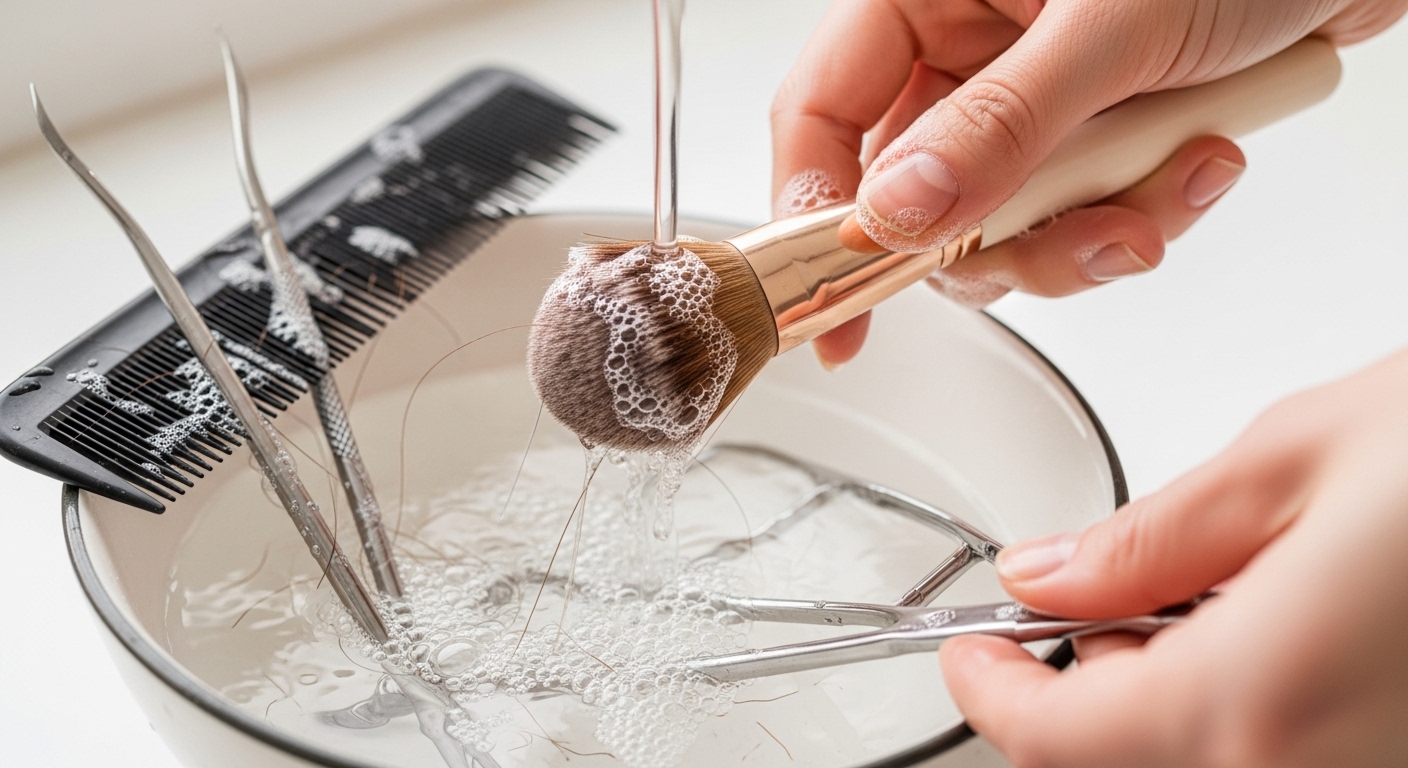
How to Pre-Clean at Home
Warm water is to be used first in order to dissolve debris. Clean the oil with a slight soap or any other cleaning material. Wet the brushes in water and rub the fingers over the bristles in the case of the brushes.
A brush of any kind, be it toothbrush or soft brush, can be used to remove any residue in case of any hair appliances, including a comb or a clip. Rinse all the tools in case of metal nail tools to remove the visible debris.
Patience is key here. Rapid motion will either damage the bristles, bend the teeth on the comb, or will loosen certain sections of the glued sections. You are targeted at the removal of observable residues without harming tools.
How to Wash with Soap and Water
Temperature and Technique
Warm water is the best as it does not destroy the tool but dissolves the oils. Glue that is already weakened or handles on wood bent can easily be burnt. An overly cold and oil and product will not be dispensed successfully.
Make circles on the fingers or soft brush. Avoid pressing too hard. This is used to shield the shape of brushes and delicate tools. It is better not to tear soft sponges but squeeze them, and combs and clips are better mopped where the fissure is.
Timing Matters
Do not leave tools in water over an extended period of time. The handles can become soft when long soaked or the bristles used can be loosened with glue or metal rusted. Wet towel Run under water and dry with clean towel. Such a measure is a precondition to proper sterilization.
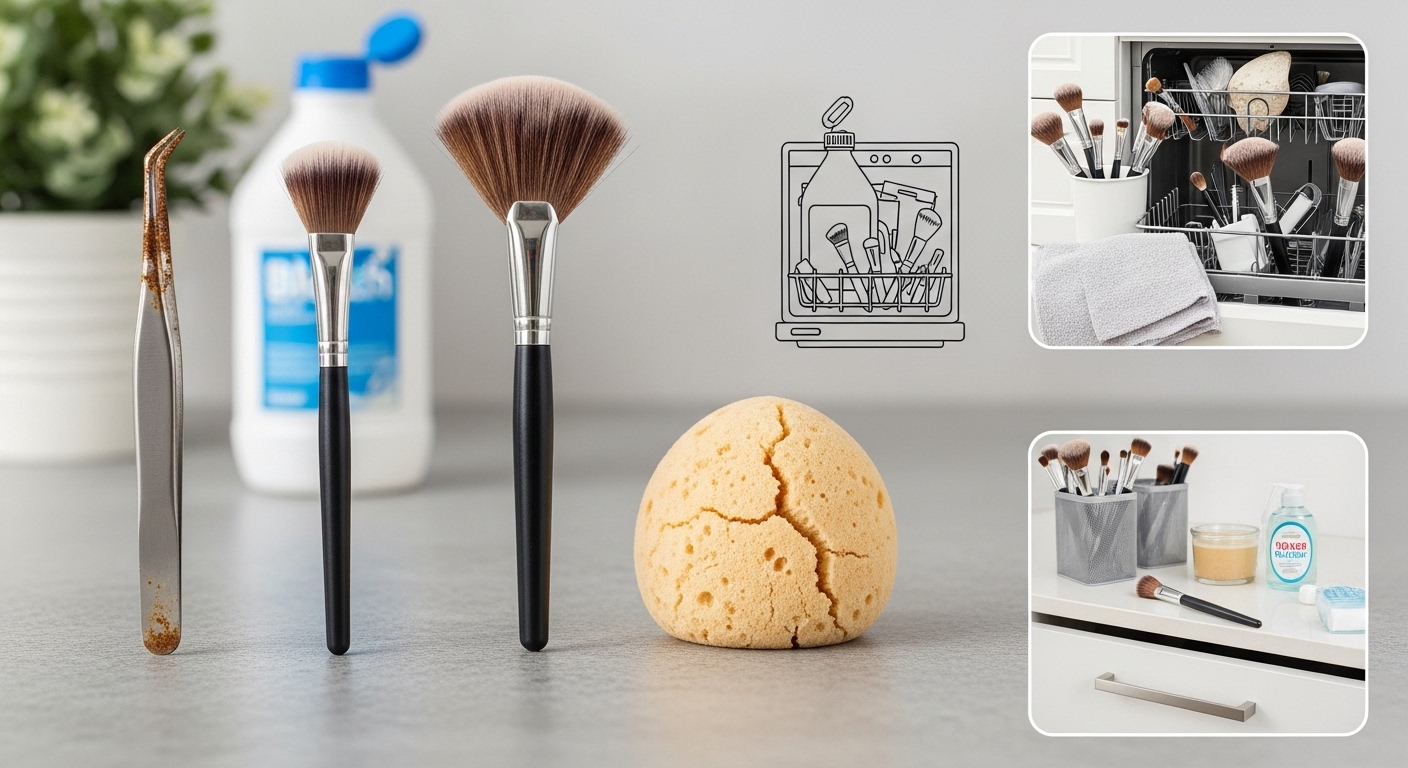
Alcohol: A Cleaner, Easy and Active
How Alcohol Works
Rubbing alcohol is readily available, it is inexpensive and effective in reducing the quantity of germs. It also works on clean surfaces and it can be applied on most tools as long as it is applied accordingly. Alcohol is not a volatile compound and can not be left behind hence can be used in the houses.
Using Alcohol Safely
You can place alcohol simply on the bristles in the case of the brushes. it is not to be soaked in the bottom where the glue can be weak. The metals should be moistened in a small dish of alcohol, and then dried. To ensure that all the grooves are covered, the nail tools must be wiped and sprayed.
Tools must be left to dry off after the use of alcohol. This will be to ensure that there is no water that can be used to nourish bacteria. Note, sterilization does not merely entail the killing of germs, but it entails their prevention.
Drying: It is a Sometimes Forgotten and Yet Important Process
Why Drying Matters
A well sterilized item may be a breeding field to a bacteria even when moist. Moulds and bacteria propagate at a very rapid pace on damp bristles, metallic or sponges.
Best Practices for Drying
Place lay on a clean towel in a ventilated place. Ensure that the brushes are either flat or angled to prevent leaking of water through the ferrule (metal strip the bristles are attached to). With hairbrushes, one should leave the bristles downwards to drain water. Nail tools and metal can be completely air dried on a towel or wire rack. Do not utilize closed containers which are not dry.
Cleaning Equipment and Storing
Clean Storage Saves Health and Saves Time
The tools should be stored in a clean and dust free area after being dry. The breathable poisons or open-top containers are the most appropriate. Tools should not be stored in humid bathrooms in which moisture can reoccur.
Avoiding Common Mistakes
-
Do not put wet tools in closed boxes and drawers.
-
Do not put brushes with wet bristles on one over another.
-
Sterilized equipment should not be mixed with dirty equipment.
-
The existence of a particular storage box of clean tools will be a long distance to getting your habit working.
The Development of Realistic Home Sterilization Routine
Day, Weekly and Monthly Habits
It is just enough of an alcohol wipe and a pre-cleaning on the tools you have been using on a daily basis at night. Brushes and sponges are to be washed more often than weekly in the soil, water. On a monthly basis, all equipment was inspected in terms of wear, accumulation or uncovered areas.
Listening to Your Tools
The tools go on to take the initiative of demonstrating that they possess certain requests. Tidings of Bristles, snatches of Sponges, rusts of Metals, or Shakings of Handles. Timely addressing of these indicators allows preventing greater problems and make hygiene effective.
Lastly is the secret of consistency. A weekly deep clean of the tools and one or two few minutes a day would keep them safe, functional and long lasting.
Green Credentials of Sterilizing Beauty Instruments
The Rationality of People to the Natural Approaches
In certain instances, my friends do not like taking chemicals because they fear shattering brushes or the sensitive skin. I know this- it is only natural that we should attempt to find natural means of sterilization that are not dangerous, painless and effective. The natural methods can reduce the number of germs and preserve the life of the tools and as such, they are the most viable or complementary to the alcohol based sterilization.
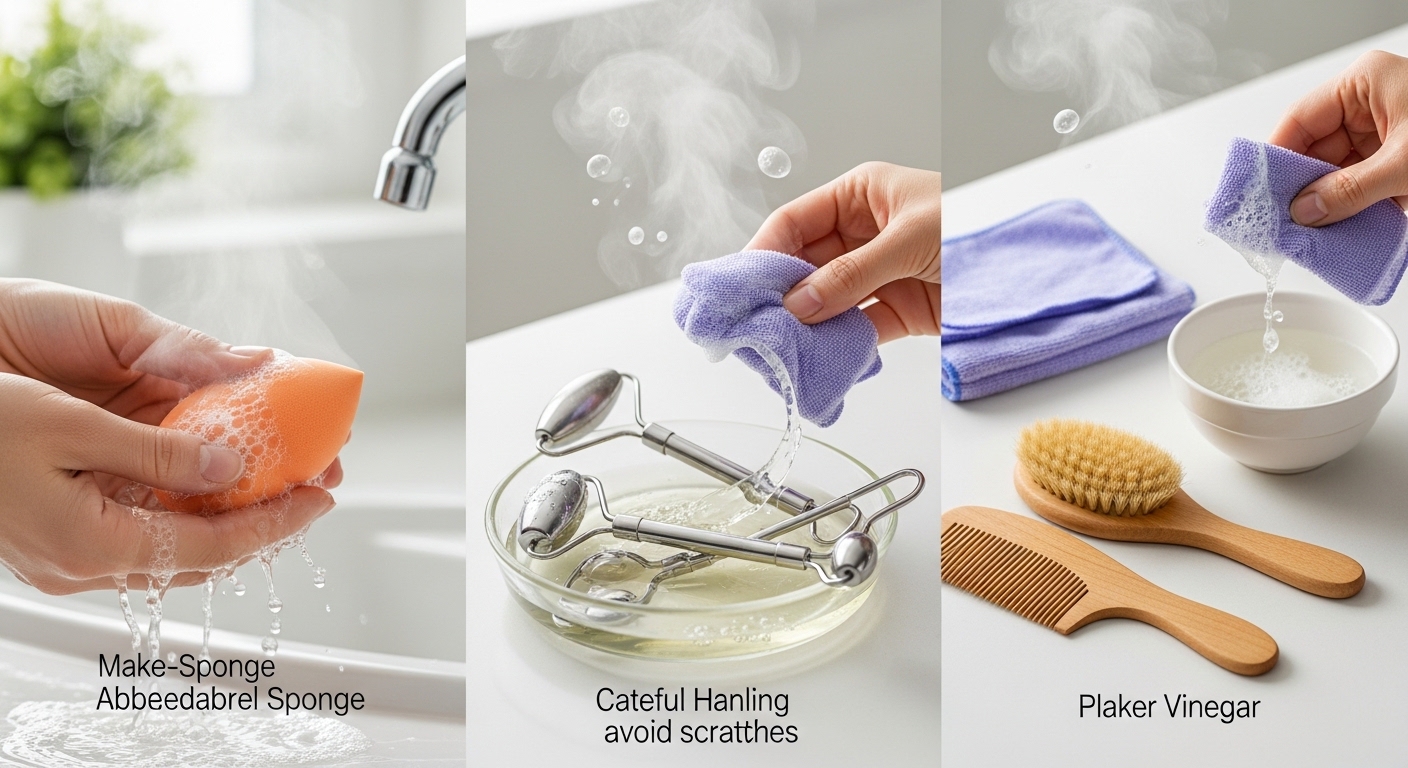
Vinegar as a Sterilizer
White vinegar has an amazing capacity to work with a lot of tools. It has antimicrobial the effect that is instrumental in the reduction of bacteria and fungi on soft and hard surfaces. When speaking of metal tools like tweezers or nail clippers, it can be wiped off by placing the tool into a vinegar solution within a period of ten minutes and killing germs. Vinegar rinse may be useful to the brushes, to which the brushes have been subjected to a dipping in the soap and water.
Instruments must not be left in vinegar too long since they will be effeminated where they are glued in bristles, or they may even be ruined by exposure to the vinegar. Soak and then the rinsed tools are dried completely with water.
Lemon and Hot Water Method
Natural acids in lemon juice are also useful in cleaning up and decontaminating microbes. In the sponges or plastic case it can be effective to put the sponges in hot water with a little lemon juice after some few minutes. It is non-dangerous, a soft one and it does not impregnate equipment.
However, natural methods are to be used frequently and at the same time as pre-cleansing and proper drying. They are appropriate in small-scale maintenance, and may not be adequate with tools that are used frequently and shared.
The Traps of Domestic Sterilization
Using the Wrong Products
Majority of people will strive to wash their domestic items like bleach or dishwasher using techniques that will damage the equipment. Bleach corrods metal and harsh soaps dry up the sponges or brushes. In the selection of material of your tools always use safe material.
Skipping Drying or Storage
A properly sterilized instrument would not be safe even when it is kept wet or somewhere damp. Moisture breeds bacteria. Allow all the tools to dry in the air and put them in clean and dry breathable containers. This is important because of cleaning and sterilizing.
Excessive or Over-squeezing
People who like the notion that it is sterilizing further to wet a brush or hard scrub it. In fact, this destroys the tools, sheds off the bristles, loosens the glued parts, or rusts the metallic ones. Sterilizing followed by gentile cleaning is more efficient than forceful ones.
Sterilizing Hair Tools
The Reason Why Hair Tools Should Be Treated in a Special Way
Full of rollers, hair style products, combs, hair oils, and dead hair. They are sticky and difficult to remove as compared to the makeup brushes that have a heavy residue on the brush. Lack of good sterilization can interfere with the work or even snap the hair.
Washing and Decontaminating the Hairbrushes
Wipe the brush by removing all the hair strands in the brush. This contributes towards the prevention of piling up of cleaning solutions. Moisten the bristles slightly in hot water in a weak soap. To make sure that they are sterilized, wipe off bristles with rubbing alcohol or vinegar solution. Brush bases made of wood must not be left soaked long since they will most probably be bent.
The latter is beneficial to Combs. Metal or plastic combs may be moistened in alcohol or vinegar, run under running water and left to dry in the air. In order to preserve the serviceability of your hair appliances, wash them.
Sterilizing Nail Tools
Why Nail Tools Are High-Risk
The nail instruments are in direct contact with the skin, cuticles, and nails and therefore they are prone to being infected by bacteria and fungi. The cause of a nail infection, the discolouration or painful nails can be a cluttered clipper, files or pushers.
Good Housekeeping Sterilization
Use metal tools when rubbed in rubbing alcohol after pre-cleaning nail tools. Wipe with alcohol or vinegar solution on the wooden tools or plastic tools. Allow to dry thoroughly and put in a special container. This issue of recontamination could be avoided by ensuring that sterilized and dirty instruments are segregated.
When to Replace Nail Tools
Everything cannot be sterilized once it is worn out. Lost papers, blunt scissors or rusty tools are replaced. Feeble tools are a loss of all the sterilization and pre-exposure to infections.
Tooling and Servicing of Technological Tools
Makeup Sponges
Sponge is able to absorb the product and bacteria can be stuck inside. Special caution is needed at the sponge even using soap and alcohol. It is possible to steam sterile sponges to remove microorganisms. The fact that it is possible to wash and dry natural products such as latex-free sponges after a normal period is also an advantage.
Metal and Glass Tools
The tools such as metal and glass such as facial rollers and tools of extracting are hard and can be sterilized easily. On wipes alcohol and vinegar soaks work. It should not be strongly scrubbed because it will scratch the surfaces and the bacteria will multiply on the scratches.
Wooden Tools
Wooden tools such as handle of comb or the back side of the brushes are to be taken note of. The latter should not be drawn long. A quick wipe of vinegar on a warm water cleaning with soap is the sure way of preventing warped hygiene.
An Easy Guide to Self-Sterilization
Daily Routine
Wipe your hands or contacts or nails using alcohol or disinfectant wipe at the end of the day. Blot the combs and brushes and metal. This will ensure that the accumulation of the germs is avoided and the tools remain clean until the next time they are used.
Weekly Routine
A day to rinse the brushes, sponges and other hair apparatus with the assistance of soap and warm water. It is then followed by a short sterilization process e.g. alcohol or vinegar solution. Dry in an airy place. This entire cleaning ensures equipment is kept clean which is utilized on various occasions in one week.
Monthly Routine
Examine all the instruments, broken, dilapidated, rusty. Modify anything that is rusted or broken or wore out. One should also keep in mind that more accumulation with an added sterilization procedure in the form of heat-resistance techniques or steam should be used.
When to Change Tools: How to Know
There are instruments that possess intuitive existence. The brush loses his bristles, the sponge is cut into rags, metal implements rot and wooden handles are crooked. These signs prove that sterilization is not sufficient any longer. The use of tools which are broken can shatter the hygiene even causing injuries.
Good maintenance of the old tools through proper change is required in the sterilization process. Consider it an aspect of the tool maintenance in greasing up a kitchen knife so that it functions.
Frequently Asked Questions
Q1: Is it possible to sterilize equipment without alcohol?
Yes. The number of the germs can be decreased by the use of soap, warm water, vinegar and lemon juice. Alcohol is not so much needed but quicker and easier.
q2: Water, boiled, will not it ruin my instruments?
Yes. Sticks of wood and pieces of wood which have been glued may be brought out of shape or lose their hold. The boiling water should be used to boil the heat-safe metal tools.
Q3: And do we have sterilize house enough?
For personal use, yes. I keep the germ level low by means of regular cleaning, sterilization and drying. The special consideration should be given to special tools.
Q4: The frequency of tools sterilization?
The tools will touch your face or nails in a daily basis, brush and sponges in a weekly basis and deep inspection and maintenance in a monthly basis.
My Opinion
There is nothing difficult in home work sterilization of your beauty items but a matter of regularity, awareness and simple measures well done. Whatever is it cleaning your brush beforehand, drying and storing your brush, sponges, combs and nail tools, all the processes will help to keep your tools clean and efficient and long-lived.
Washing cooking utensils can be done using natural cleaning chemicals (vinegar or lemon) combined with alcohol or soap and in several ways. This is because there is the reality not only of the daily but also weekly and monthly routine to ensure that there are no germs on your skin and hair and nails not only that the longevity of your beauty products is extended.
One imagines the healthy tools as healthy outcomes. The sterilization process is not a periodic process but one that is supposed to be routine. Thou shalt be happy as thy equipments will be happy and thy skin, too.


